Tuesday, 24 May 2016

Summary of Digital Making Process

DIGITAL PROCESS
The first process includes all the digital aspects of the course. This requires gadgets like smartphones, laptops, cameras, and a good internet connection to access the necessary apps.

The first app required is 123D Catch by Autodesk. This is an app specializing in photogrammetry for easy 3D modeling. It is readily downloadable from the App Store or Google Play for smartphones and from Autodesk for laptops or desktop computers.
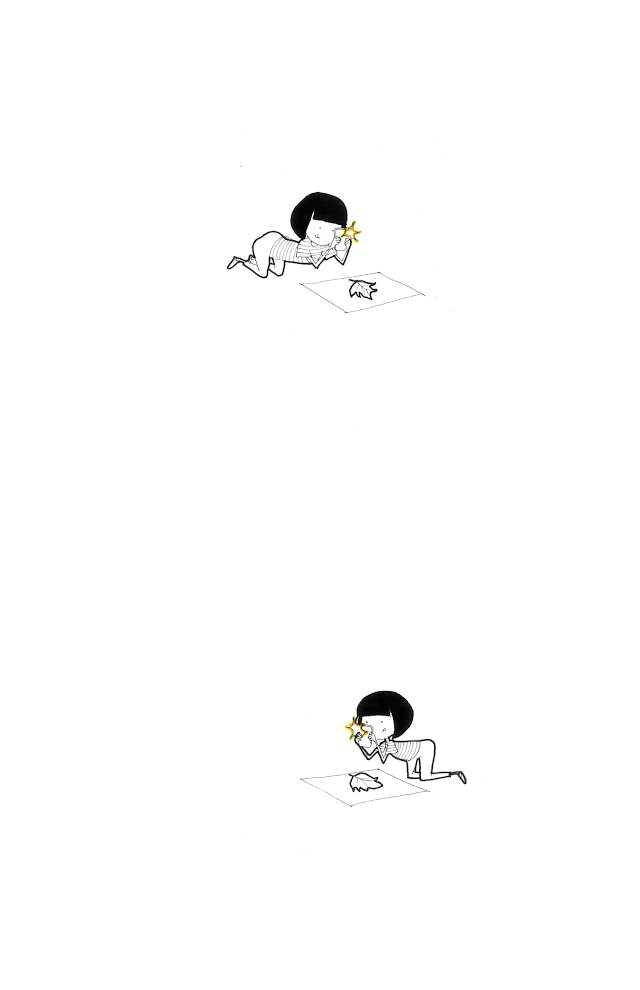
The first thing you need to do is to find a good object to model. Ideally, the object would have a beautiful form for the succeeding process which includes metal shaping. Also, a surface that has easily recognizable colors and textures and low reflectance and shadows. Using 123 Catch App, you can easily take pictures of the object on different viewpoints and angles. 

Just make sure you keep the object still and in good lighting. Lay it flat on a sheet of paper. Avoid too much reflection, overexposure, and a bad quality camera when you start taking photographs. 
After taking the photographs, just start the project and wait for the 3D model to be generated.

The next app requires is 123D Make, also by Autodesk. This app lets you create a template of your 3D model which you will need later on to make a laser-cut formwork. Similar to 123D Catch, this app is readily available on smartphones and computers. The templates that you could generate on this app could be through a variety of construction methods, material type and thickness, depending on your preference. 

After deciding on which method and material to use, you will need to modify some properties of the template files on Adobe illustrator. The key thing to remember is this: blue lines are engraved and red lines are cut through. 


LASER CUTTING PROCESS
The second process includes laser-cutting the template pieces created from the 123D Make app. This requires Adobe Illustrator, the material/sheet to be cut (ideally plywood for a strong finish), glue, and access to the laser cutters. 

After editing the files on Adobe Illustrator, you will need to upload these files on the laser-cutting lab computers. You will need to modify the printer settings according to your material/sheet and make sure that the laser focus sits inside the sheet edges. 

Turn on the power button for the laser cutter and then for the air filtration. Lay your sheet inside the laser cutter and start printing.


METAL SHAPING PROCESS
The next and final process is the metal shaping process. Basically, it is physically shaping an aluminum sheet to adhere to the contours of the 3D template. This requires access to the workshop tools like the bossing mallets, dollies, shot bags, metal cutters, etc.
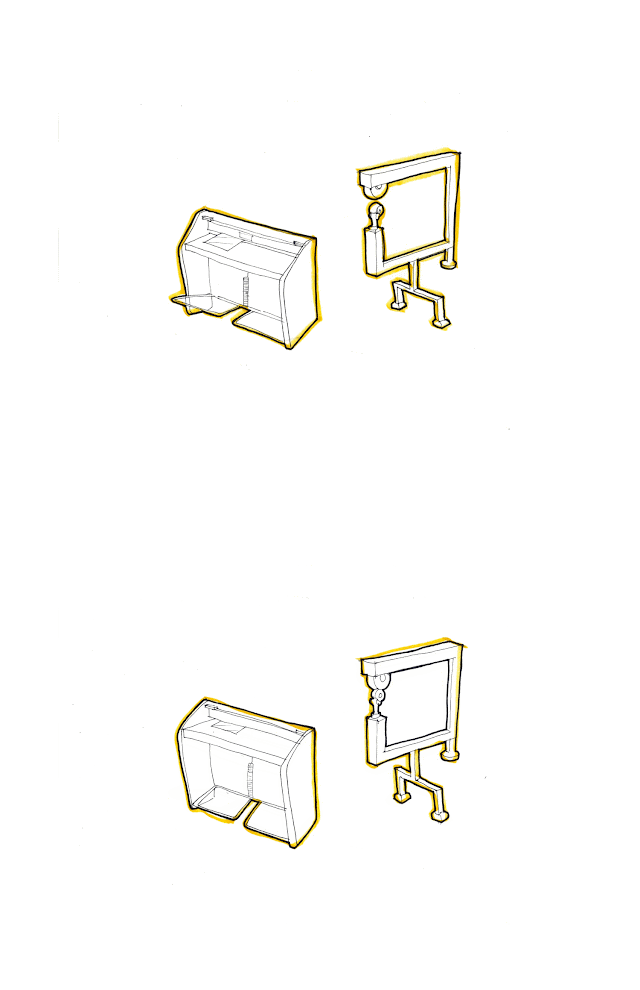
You will also need tools like the guillotine to cut large pieces of metal sheets and the English wheel for creating a smooth finish to the skin's surface. These tools require extra care when handling. 
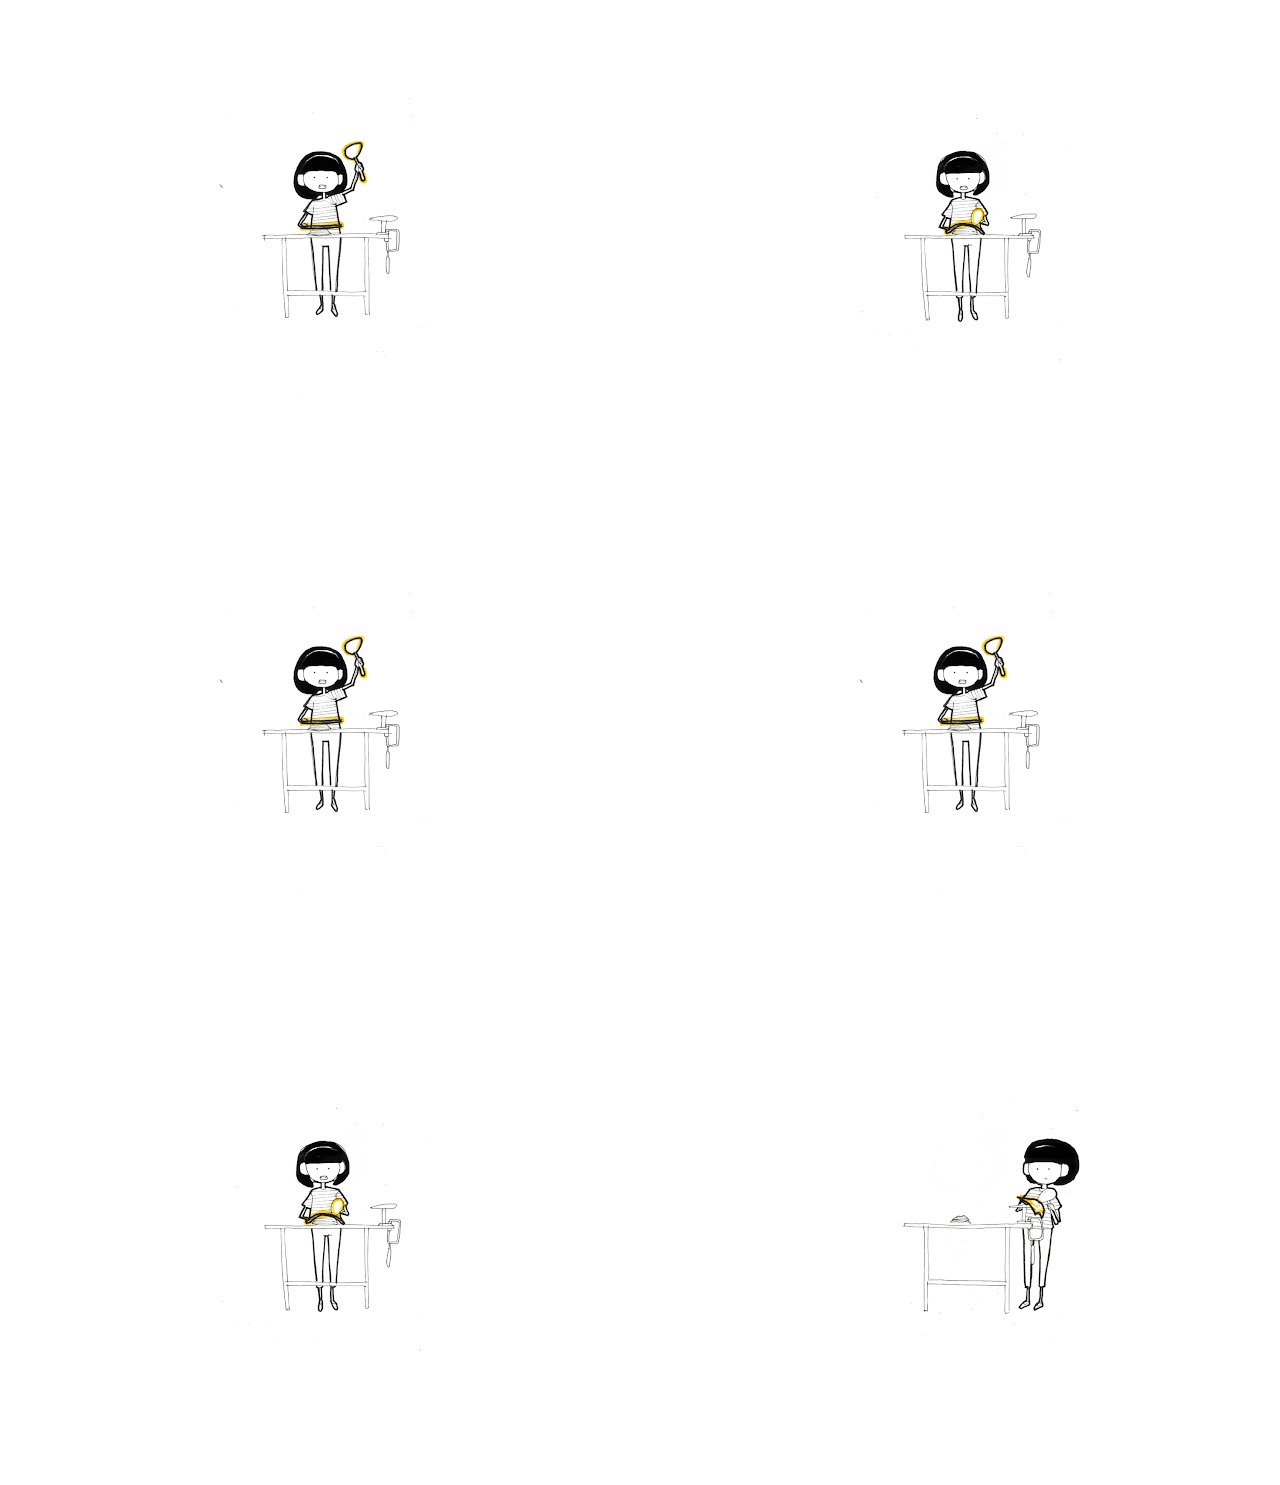
The first thing to do is to think of a plan and approach. This is how it basically goes:

1. Cut and mark the sheet so it covers the 3D template.
2. Mark the sheet according to the contours. The marks will serve as guides as to where to start hitting the metal sheet. 
3. Start hitting against the timber pieces using the tapered bossing mallet. Keep doing this until the sheet starts to curve.
4. Start hitting against the 3D template to follow the contour details. You can use a variety and a combination of tools to achieve the form.
5. Once you get the skin closely adhering to the 3D template, you can refine the sheet using the English wheel. Or you can use the dollies and mallets to gently hit the skin until the dents even out. 

ON MAKING THE TWO INTERDISCIPLINARY SKINS


The basic steps in creating a metal skin is generally the same for the two interdisciplinary forms. (See steps above). Though at some point of the whole process, the approach may vary on some more specific aspects.

1. Scale
If you have a large scale form, you would need a bigger area of sheet metal to shape but this will give you more access to tools (e.g. English wheel) and possibly a really smooth and beautiful finished product. 

2. Level of Detail
The level of detail of the contours of the form will dictate the final appearance of the skin. This will require you to think of which proper tools and techniques will best work for the template. The more details you get from your 3D template, the more variation on the skin you get. 

I thought it was best to use the stacked slices rather than the interlocked ones. This makes the template more robust and you will be able to hammer on it directly and the contours give more detail that is close to the original object. 

3. 3D template
This varies mostly depending on the modeled object, but also, on the construction method, and the type and thickness of material to use for the 3D template. You have to choose a really good object or portion of an object that shows just the right amount of curves and details. If you choose a really complicated one, it may take more time and effort to make the skin. 

4. Tools
The availability of tools that you would be able to use for shaping the metal is really important. For example, you may need to make sharp curves or gentle curves for the metal skin. You may apply the same approach in making these two different curves but you will need different tools to create them. Sharper curves may require the tapered dollies and more gentle curves may require the dome dollies. 

In my case, I used the same method and material for my two 3D templates. This gave me the same level of detail and scale. But since the leaf skin has sharper curves compared to the mouse skin, the approach I had for the skins were different. I was able to use a more free-hand approach but very limited tools for the leaf skin. (tapered t-dollies, radius end mallet, and a shot bag) For the mouse skin, I relied heavily on the 3D template. The form led to a more conventional approach but more access to tools. (tapered mallets, radius end mallets, shot bag, all the dollies, and the English wheel)

I say it all depends on the form. You can always experiment with the approach and shaping techniques.

Tutorial 2- Detailed Process: Mouse Skin

PROCESS 1- DIGITAL

What you need:
Chosen object (mouse)
Smartphone/ desktop
Wifi

What to do:
Step 1- Find an interdisciplinary object

Step 2- 123D Make

1. Open 123D Make on your desktop.
2. Open the object file of your 3D model
3. Change the Manufacturing Settings of your object on the left panel of your screen.
4. Choose “Stacked Slices” as the construction method.
5. Click on the gear button beside “Manufacturing Settings”. A pop-up panel would appear at the bottom par top the screen.
6. Choose the following settings for the material:
          Units: mm
          Width: 600
          Length: 300
          Thickness: 3mm
(You can check the sheets on the right panel of the screen.)
7. On the left panel of the screen, select “Get Plans”. A pop-up panel would appear at the bottom part of the screen.
8. Choose the following settings for the file:
               File Type: PDF
          Units: mm

PROCESS 2 – LASER CUTTING

What you need:
Adobe Illustrator
3mm plywood sheets
Glue
Laser cutting machines

What to do:
Step 1- Adobe Illustrator

1. Open Adobe Illustrator.
2. On the File Menu, select “Open” and open your PDF files.
3. Drag the mouse to select everything.
4. On the top panel of the screen, change the stroke to .001
5. Select the outline of the template pieces.
6. Double click on the color picker on the left panel of the screen. A pop-up panel for the color settings would appear.
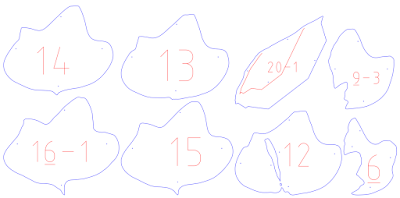
7. Choose and apply the following settings:     
          R: 255
          G:0
          B:0
8. Select the guide objects inside of the template pieces:
9. Double click on the color picker on the left panel of the screen. A pop-up panel for the color settings would appear.
10. Choose and apply the following settings:
          R:0
          G:0
          B:255
11. On the File Menu, select “Save As” and save it as a PDF (.pdf) and as an illustrator (.ai) file

Step 2-Laser Cutter

1. Open the laser cutter and lay your plywood sheet.
2. Turn the power on.
3. Turn the filtration system on.
4. On the Fab Lab computers, open your file on Adobe Illustrator.
5. Check if you have the proper settings:
          Line Stroke: .001mm
          Template Outlines: R:255
          Template Guides: B:255
(Blue lines are engraved as template guides and red lines are cut.)
6. Press “Ctrl+P” and select the VLS printer.
7. On the bottom right side of the taskbar, open the VLS Printer.
8. Make sure that the laser focus sits inside of the plywood sheet by toggling on the focus tool.
(You can use the pins from the lab to make sure your plywood sits straight on the laser cutters.)
9. Change the printer settings of the material. Choose proper settings for the natural wood-medium grade.
10. Click the “green button” to print.
11. Stack the template pieces together to create the formwork.

PROCESS 3 – METAL SHAPING

What you need:
English Wheel
Bossing Mallet (tapered wooden, tapered plastic, radius end)
Shot bag
Table-top sheet metal cutters
Sheet metal cutters
Sharpie
Dome, Tapered, OvalDolly
0.5 to 1 mm thick aluminium sheet
Chosen object (leaf)
Tape
Wooden dolly

Step 1- Cutting the metal sheet

1. Lay the formwork on top of the metal sheet.
2. Estimate how much sheet you need to cover the formwork and mark it using a sharpie.
3. Cut the metal sheet according to desired length. For the mouse template, you can cut a 15cm diameter circular sheet using the table-top cutters.

Step 2- Shaping the metal sheet

1. Locate the centre of the sheet metal.
2. Using a sharpie, mark concentric circles along the metal sheet according to the contours of the 3D template.
3. Using the tapered bossing mallet, start hitting the marked circles on the wooden dolly in an alternating clockwise and anti-clockwise motion (form centre to outward). This will help you create a bowl form.
4. Use the plastic, tapered bossing mallet to shrink the edges of the bowl.
5. Once you get a bowl form close to the 3D template, neaten the concave side by hitting it on a shot bag with the radius end mallet.
6. Lay the sheet on top of the 3D template.
7. Mold the sides of the sheet using your hands, so that it starts to fit the 3D template.
8. Check if the front and back parts of the sheet lay completely on the 3D template. If not, you can mark these areas according to the contours, and start hammering (similar to #3) until it fits the template.
9. Slide it back and forth through the English wheel to polish the surface.
10. Lay it on the 3D template and gently hammer straight on the side curves using the finest radius end mallet.
(You can tape it in place to make sure it does not move.)
11. Once you get the side curves, use the most appropriately-sized dolly to hammer on in small quick motions to create less dents on the more detailed curves. (Since you won’t be able to use the English wheel to polish these areas)
You can switch between the tapered dolly, dome dolly, and oval dolly depending on the level of detail of the curve.
12. Keep doing this until you’re satisfied with the skin’s form and texture.

Tutorial 1- Detailed Process: Leaf Skin

PROCESS 1- DIGITAL

What you need:
Chosen object (leaf)
Smartphone
Camera
Wifi

What to do:
Step 1- 123D Catch

1. Choose a good object to model. (in my case a leaf)
2. Download 123D Catch Make on your desktop and smartphone.
3. Open 123D Catch app and start a new capture.
4. Take as many pictures of your chosen object (leaf) in different angles.
         -Make sure the object is still.
        -Allow good lighting
        -Avoid reflective surfaces
        -Lay it on a sheet of paper
5. Start processing the photos and wait for the 3D model to be generated.
6. Check your model and save it once you are satisfied. You can always a make a better one.
7. Open 123D Catch on your desktop.
8. Load the saved 3D model from your smartphone.
9. Export it as an object (.obj) file.

Step 2- 123D Make

1. Download 123D Make on your desktop.
2. Open the object file of your 3D model.
3. Change the Manufacturing Settings of your object on the left panel of your screen.
4. Choose “Stacked Slices” as the construction method.
5. Click on the gear button beside “Manufacturing Settings”. A pop-up panel would appear at the bottom par top the screen.
6. Choose the following settings for the material:
          Units: mm
          Width: 600
          Length: 300
          Thickness: 3mm
(You can check the sheets on the right panel of the screen.)
7. On the left panel of the screen, select “Get Plans”. A pop-up panel would appear at the bottom part of the screen.
8. Choose the following settings for the file:
          File Type: PDF
          Units: mm

PROCESS 2 – LASER CUTTING

What you need:
Adobe Illustrator
3mm plywood sheets
Glue
Laser cutting machines

What to do:
Step 1- Adobe Illustrator

1. Download Adobe Illustrator from Autodesk.
2. On the File Menu, select “Open” and open your PDF files.
3. Drag the mouse to select everything.
4. On the top panel of the screen, change the stroke to .001
5. Select the outline of the template pieces.
6. Double click on the color picker on the left panel of the screen. A pop-up panel for the color settings would appear.
7. Choose and apply the following settings:
          R: 255
          G:0
          B:0
8. Select the guide objects inside of the template pieces.
9. Double click on the color picker on the left panel of the screen. A pop-up panel for the color settings would appear.
10. Choose and apply the following settings:
          R:0
          G:0
          B: 255
11. On the File Menu, select “Save As” and save it as a PDF (.pdf) and as an illustrator (.ai) file

Step 2-Laser Cutter

1. Open the laser cutter and lay your plywood sheet.
2. Turn the power on.
3. Turn the filtration system on.
4. On the Fab Lab computers, open your file on Adobe Illustrator.
5. Check if you have the proper settings.
          Line Stroke: .001mm
          Template Outlines: R:255
          Template Guides: B:255
(Blue lines are engraved as template guides and red lines are cut.)
6. Press “Ctrl+P” and select the VLS printer.
7.  On the bottom right side of the taskbar, open the VLS Printer.
8. Make sure that the laser focus sits inside of the plywood sheet by toggling on the focus tool.(You can use the pins from the lab to make sure your plywood sits straight on the laser cutters.)
9. Change the printer settings of the material. Choose proper settings for the natural wood-medium grade in 3mm thickness.
10. Click the “green button” to start laser cutting.
11. Stack the template pieces together to create the formwork.

PROCESS 3 – METAL SHAPING

What you need:
Guillotine
English Wheel
Bossing Mallet (radius end)
Shot bag
Sheet metal cutters
Sharpie
Tapered T-dolly
0.5 to 1 mm thick aluminium sheet
Chosen object (leaf)
3D template

What to do:
Step 1- Cutting the metal sheet

1. Lay the formwork on top of the metal sheet.
2. Estimate how much sheet you need to cover the formwork and mark it using a sharpie.
3. Cut the metal sheet according to desired length.
(If it’s too big, you can use the guillotine. Lay the sheet metal flat between the blades and step on the pedal while gripping the sheet in place. If it’s not that big, you can use the metal shears)

Step 2- Shaping the metal sheet

1. Using a sharpie, mark the metal sheet according to the contours of the 3D template.
2. Start hammering gently on the marked areas either on a shot bag, or directly onto the 3D template, to get the initial form using the finest bossing mallet. Keep doing this until you get the basic form.
3. Cut the excess bits of the sheet metal.
4. Once you get the basic form, start shaping the detail curves on the finer edge of a tapered t-dolly. The technique I used was to slide the sheet on the edge of the tapered t-dolly while hitting it with a bossing mallet. This creates less dents on the skin.
(This is where you use the actual chosen object as reference.)
5. Once you get the detail curves, start hitting the sheet in small quick motions to create an almost smooth surface, (since the detail curves would not allow you to use the English wheel to smoothen the dents) Keep doing this until your satisfied with your skin’s form and texture.

Friday, 13 May 2016

Interdisciplinary Skin: Mouse


The next assignment is creating a metal skin of an interdisciplinary template. We were allowed to be in groups and share our first templates with students from other disciplines and let them choose which one they think is the most interesting to make (more like easy and less exhausting).We chose an architectural computing guy's template which is a computer mouse.


So, he suggested we use a more rigid material for the template (because he used cardboard and regrets it) and use the stacking method to get more details of the form (because he used the waffling method and regrets it). He gave us a copy of his 3D Make model so we could change the settings to our preferred material and construction technique.

Basically, just follow the steps from the previous assignment.


1. Modify settings from 3D Make. (I chose the same material and method: 3mm plywood through stacking method)
2. Modify settings on Illustrator. Make sure to change the line color and line stroke.
3. Laser cut.
4. Start hitting the metal sheet!


For my sheet, I now used the 1mm thick aluminum (which is actually just a scrap metal we found on the lab) 


The first approach is to mark the center of the circular sheet and draw circular patterns based on the form of the mouse. This marks the areas that you need to hit in order to initially create a bowl form. (Doing this first will save you a lot of time and strength because it's gonna be easier to shape the sheet later on)  Using the wooden mallets, you can start hitting the marked areas in alternating clockwise and anti-clockwise motion as you go outward. Once you reach the outermost part of the sheet, you can use the plastic mallets (these are heavier) to shrink and curve the edges.


Once the sheet is close to a bowl form, you can lay it on the 3D template to help you get the curves and other details. In my case, I laid it  on the 3D template and tried shaping it as closely as possible using my hands (cos I'm strong like that). 


Once I got the basic form, I started hitting it using the finer bossing mallets really gently to avoid too much dents since the form won't allow me to use the English wheel on the more angled edges. (You can tape it on place to make your life easier)


You can practically take a mirror selfie on my skin. Kind of abused the English wheel here.


Just keep doing this until you're happy with your skin.


Sunday, 24 April 2016

Metal Shaping

Now this part is the really fun (and really exhausting) part. All you will need is an aluminum sheet around 1 to 1.6 mm thick, the laser cut plywood template, and access to the workshop tools (and make sure to go in first because the competition for the tools is fierce) Using the plywood formwork, you can start shaping the aluminum sheet with the metal-shaping tools from the labs. There are a variety of mallets in different sizes and shapes which you could use to shape the metal. You can hit the sheets on shot bags (sand-filled bags) or dollies (t-shaped or dome-shaped metal shaping stations) and smoothen the dents out using the English wheel once you get your final form.

The best thing to do first is to cut a piece of metal that will cover the entire formwork. You can trace an outline using markers. (this will eventually fade out with all the pounding)

The hardest thing to figure out was how and where to start so in my opinion, just start pounding the aluminum sheets. It's gonna look ugly and really far from your model at first, but eventually you will get the hang of it.


I did encounter some issues with my model though. I was only able to get the 0.5 mm thick sheets which was way too thin causing the sheet to rip on some parts. For my object, which is a leaf, I realized it wasn't the best object to have modeled because the curves were way too complicated and detailed for the bossing mallets and English wheel. And my formwork lacked the exact detail for the skin to actually adhere to. I was only able to use it to follow the basic contour of the leaf model but had to make the details up myself. (I should have worked on a better 123D Make model)


Still, I just tried to copy the form and contours of the actual leaf using the tools from the workshop. I mainly just used the finest bossing mallet to hit it on a tapered T-Dolly to create the curves and other details of my form. I also realized at this point that I had to be really careful on hitting the sheet as I wouldn't be able to use the English wheel smoothen the dents. 


Laser Cutting

The next part is the start of the fun part! Once you have the PDF files of your templates, the next step is to have them laser cut. You will need to change the settings of the exported files using Adobe Illustrator. 

First thing you need to change is the outline color. You have to make sure that the outline of the templates you want to actually be cut are red, and the ones you want to just be scratched are blue (usually the scratched surfaces serve as guides for when you put the pieces together)

The other thing would be the line weights. You should change the strokes to .001 (if you don't want the laser cutting to take forever)


After changing all the settings on Illustrator, it's time to laser cut. You just need to save your PDF files on the labs and make sure you modify the settings for the laser cutting machines. Choose the appropriate material and thickness of the sheet you are cutting and make sure that the laser cutters are on focus and are cutting inside the sheet. 


For my templates, I chose the 600 x 300 x 3 mm plywood sheets. (it is good to check the quality of the plywood and make sure it's not bent so that it actually cuts through the sheet)